|
Putting the Presentation on the Web
Quite often after making a PowerPoint presentation, your audience will request the presentation itself, in addition to any handouts you may have given them. A solution is to put the presentation on the Web. Placing a presentation on the Web can be accomplished in one of two ways:
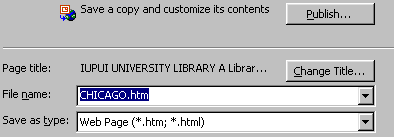
HTML Wizard The bottom three choices allow you to specify the file type, file name, and the page title. You should leave the type set to Web page (*.htm, *.html).
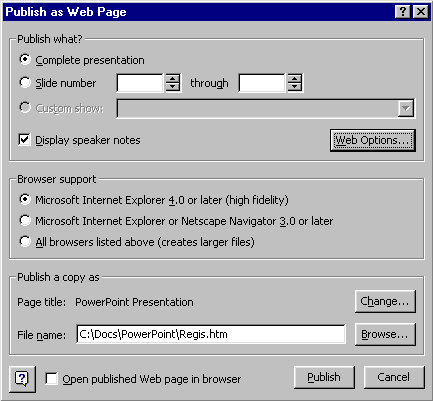
PowerPoint will pick up the first line of text in the presentation and set the HTML TITLE tag to that text. It is unlikely that is what you will prefer. The TITLE information is that which displays in the colored band at the top of the browser window. It should not be confused with your heading or page contents title. To make additional choices for your web pages, click Publish. In the Publish as Web Page dialog box, you can choose
When you make selections not supported by the reader's web browser, they will see a message to that effect when selecting the presentation and will be asked if they wish to continue. The static presentation slides will show, but any special effects not supported by the browser will be ignored. Click Web Options for more selections. Click the General tab to choose to add navigation controls (such as forward, back, home) and their colors, to display any slide animation you may have used (slide transitions, not movement on the slide itself), and to resize slides dynamically according to the size of the reader's browser window. The Pictures tab allows you to specify the default browser window (800x600 is the current standard). To create the web files, click Publish. Testing the Web
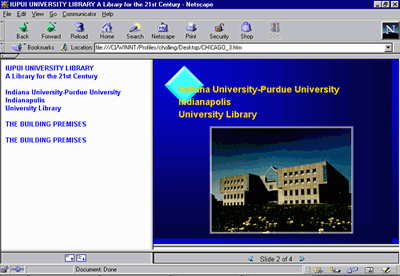
Presentation When you have located the folder containing the control file, and open it, the presentation will open as a local file for you to review. The web presentation looks similar to the sample below. Notice that it looks a great deal like the PowerPoint Normal View with the list of slide titles in the left pane, the slide graphic in the upper left pane, and the presentation navigation buttons in the lower right pane. The left pane demonstrate another reason why it is important to title each of your slides in the Title Placeholder.
Remember that you will still have to move your PowerPoint/HTML files to a web server in order to make the presentation available for public use. borrowed from http://www.iupui.edu/~webtrain/tutorials/powerpoint2000_basics.html#ppt_to_web |