 |
|
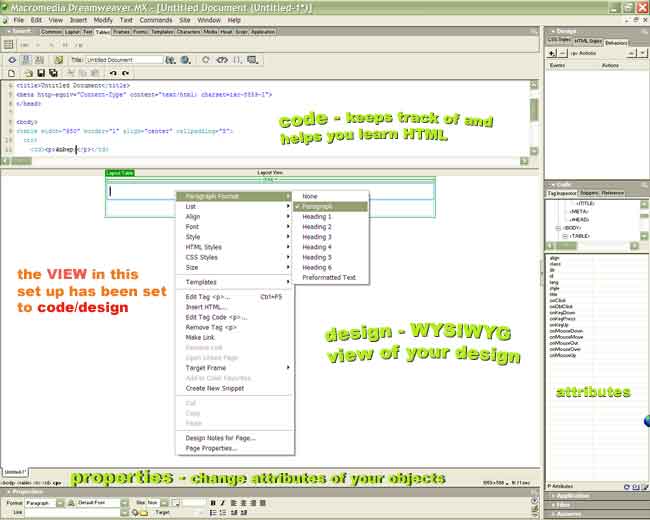
DreamWeaver is a great
application for designing WebPages and websites. As usual the greatest difficulty with many graphics packages is in getting off to a happy start. Below we have the DreamWeaver set up so that the VIEW is HTML and Design this allows the designer to keep track of the HTML code while creating in WYSIWYG. (what you see is what you get) (your page can be set for only design or only HTML as well) Attributes can be changed on the left (click the little toggle on the middle left of the design area). Various properties can also be changed at the bottom . A table has been developed without using HTML (click the Tables Tab) and is set to 650 pix wide (fits most screens), centered, and 2 rows were set up for content.
References> |
 |
|
before you start work producing
content >>>>> - make sure that you have a sketched out idea of what the layout of your page will look like - use tables to contain your content and set the width of the table to 650 pixels wide or less and it will fit most monitors in use today - create folders on the drives where you store
your text and image files that will help you organize your content, this
will make large site management easier - upload your finished files into the correct
folders on your web drive and then open your web browser and test your new
WebPages on your web site.
|