 |
|
Here's
a fast way to create
some little animations for your website. If you've been
on the internet at all since, oh, 1992 or so, you've
definitely seen these little things.
Start by opening all the
images you'll want in your animation .
Then
create a new blank document the size you want your
animation to be.
Now arrange
these windows on your workspace so you can see all the
images.
One-by-one,
drag the images into the blank document. They'll
automatically create their own layers.
These are the different
frames ("cels") of your animation: |
 |
For
a simple animation, click File>Save for Web.
The familiar dialog window will pop open. For an
animation, choose GIF from the drop
menu, and tick ON the Animate box. Down
below this area, you'll see a place where you can adjust
the animation's speed and looping (repeating), and
scroll through the separate frames:
|
The output will result in a
gif animation -
- like the one to the right:
Kinda cool, but sort of
drab. It's just a series of images that pop up and don't
seem to relate or interact with each other at all. What
if we could make them blend a little better?
|
 |
|
Motion
blur to the rescue! First, duplicate each layer by
dragging it into the New Layer icon at the top (or
bottom, depending on your version of PSE) of the Layers
palette. Choose one
of the duplicate layers, and apply a Motion Blur filter
to it (Filters>Blur>Motion Blur). The
settings I used are below:
Once you've applied the
blur, choose the next copied layer and press
Ctrl > F to apply the same filter with the same
settings to it. Repeat this until all the duplicate
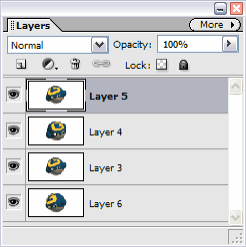
layers are blurred. Arrange them as shown in my layers
palette to the right:
PSE animates from
the bottom of the stack to the top, so keep
this in mind as you arrange your layers. |
|
Click
File>Save for Web again, and make
your output settings to result in a smoother
animation like the one below:

|
Remember
to set the time delay for your animation .
This will determine how many frames per second will
be displayed.
|
|
 |
 |
|
|