
Welcome to the grade 12 COMTECH
Agenda.
check to here to find out what projects are in progress and how they are expected to be completed and subsequently evaluated
![]()
harrismailbox@gmail.com is where to send me stuff.....like your url
Create a ZYMIC ACCOUNT - use ZXQ subdomain option for school use
Check this page for instructions on FTP set up for Zymic and DreamWeaver
Final Evaluation = Portfolio | Final Evaluation |
..................................Portfolio Directories P1 | P3
Why studying Communication Technology
is putting You ahead of the Curve
![]()
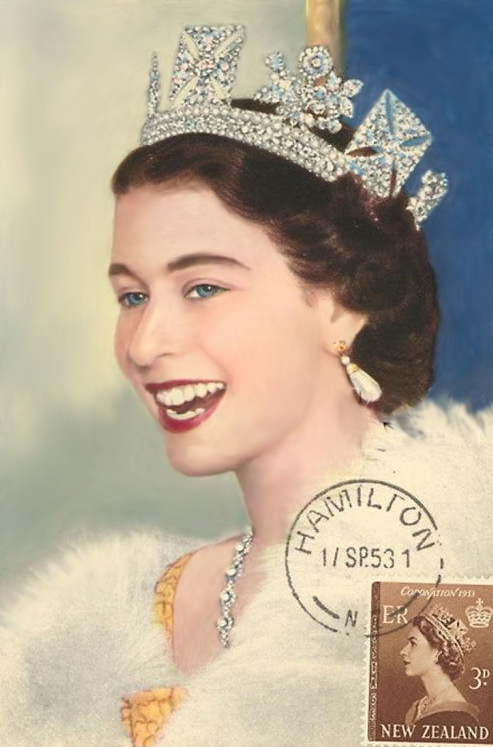
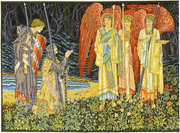
Queen Elizabeth 2nd
Diamond Jubilee
![]()

| things to do to complete Comtech | ||
|
|
portfolio | bio see below keep it simple |
| in school interactive panorama | downtown flash slideshow downtown panorama |
T-shirts buttons are a fun option if you are finished all the other stuff |
June 4 - time to finish up! if you are ready to do a T- shirt lets do it now avoid the rush
- putting your slides in a Flash Slide Template
-
check out Nicol Bordigon's
Evaluation for the Flash Slide Show
- install 5 of your best gently rendered DownTown pictures into the Flash Slide Template
and change up the Title(s)
- the template is made to accept 640 p 480 p images (see last week)
![]()
May 28 - getting near the end!
Downtown pictures - select 5 of your best pictures adjust them in PhotoShop
and crop/resize them to 640 pix X 480 pix put them in a separate folder
and we will put them in a Flash SlideShow.
- your downtown panorama will be presented in a separate page and does not have to be interactive
 Portfolio Time
- its time to wrap things up in the course!
- make sure that you understand what is expected in the portfolio it will reflect the skills that you have aquired in the last 2 years as well as presenting an online portfolio of this years projects
 Your Bio
- your portfolio will include a bio on the homepage that will contain ...
> who you are
> what makes you unique
> what your future goals are including
where you want to study / travel / or work
---- > your bio will be contained on your homepage and can be presented
in one of the following media
- video - max 45 seconds
- GIF animation - slide frames containing images and text with variable frame rates
- Flash animation - keep the quality high and the duration short
- iFrame - create a scrolling Iframe with pictures and text in a slice
![]()
May 21 2012 - time to finish up the Digital Photography Project
- have you posted your quizz marks on the sheets on the board ?
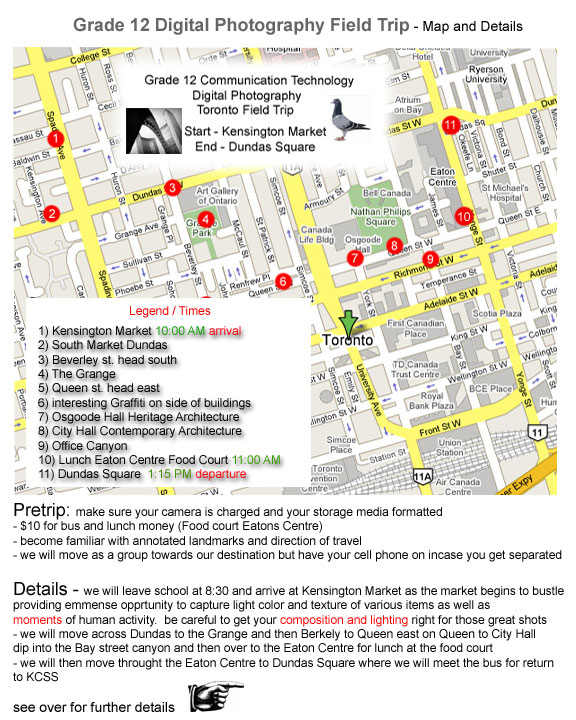
- this Friday we will be attending the Digital Photography Field trip starting at Kensington Market

and ending at Dundas Square
- if you need a camera please get it before we go
- make sure that your camera's battery is charged the night before
- bring some money for lunch
- watch the weather report in case rain is forecast
- please have your field trip permission form on hand Friday morning
- remember to keep safe and be respectful of persons in your photographic field
![]()
May 14 2012
- Panorama - create a panorama around the school in a location that
that is open and where a single narrow angle shot will not suffice
- the front of the school comes to mind
- the panorama will become part of a 2D virtual viewer experience
- be sure to create a separate folder called panorama and save all items such as
the PTviewer.jar / panorama.jpg / panorama.html in that folde
- this level of oraganization will help you successfully integrate all features of this project
![]()
Your Panorama will be rendered in Photoshop and will look much more seamless
![]()
April 23 2012
Photographic Composition
Fibonaci numbers | 2 |
Golden Mean
![]()
April 10 2012 - just for interest view Masters of Photography
Digital Photography Phase 1- intro to photography
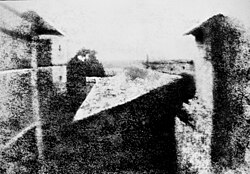 |
| Nicéphore Niépce's earliest surviving photograph of a scene from nature, circa 1826, "View from the Window at Le Gras,"Saint-Loup-de-Varennes(France). |
C - do Quizzes at Quizstar qizzes must be complete before picture taking
1) create a login you will remember
2) - use your name as seen open attendance list
3) - search for Teacher = Michael S Harris
Digital Photography do quizzes ---- record results
D - in school photography and abum creation
E - create a contact sheet comprised of ALL your pictures taken around the school
Phase 2 starts with a Downtown Field Trip Photoshoot sometime in May
- pictures taken on our trip will be used to create a 2D VR panoramic image and a Flash Slide Show
![]()
April 2 2012


- working on Poetic Vision ---- completing the production phase and entering the Post Production Phase
- remember to Publish as an .swf
- next topic Digital imaging
![]()
March 26 2012
- see last week for full instructions and evalution
- be sure to size your canavas to 830 x 480
- preproduction probably starts with a song or voice over
![]()
March 19 2012
- Poetic Vision ![]() Evaluation a multimedia
Evaluation a multimedia
- 20 - 30 seconds of text, sound, and motion
- example in Flash ![]() Sean Bulman
Sean Bulman
| This example is a recent Shayne Maglay Production produced at Humber College using a video editor (your choice) |
![]()
| Characters for your animation (transparent GIFs with a matt colour the same as this blue) | ||
 |
 |
 |
|
 |
 |
| Cast of characters in your timeline animation. Feel free to create a more diverse cast. |
||
- this week you will complete all previous work due as posted in the column to he right (What's Due) and a timeline animation using the some of the cst of characters above
- keep this animation banner size 800 p x 150 p and consider duplicating and then shrinking the animation to button size 120 x 50 to make an animated button to link it
- allows you to animate image layers (.psd) opacity/styles/position/text warp
the trick to remember is the use of key frames
- timeline animation runs frames at 30 fps so keep image sizes smallish
to minimize file sizes
- remember to save as .gif
![]()
2
- working on an imaginative interactive page due friday
- Interactive Web Design
- evaluation check before submission

......................................Timeline Animation in CS3
- allows you to animate image layers (.psd) opacity/styles/position/text warp
the trick to remember is the use of key frames
- timeline animation runs frames at 30 fps so keep image sizes smallish
to minimize file sizes
- remember to save as .gif
![]()
2
- Interactive Web Design
- evaluation
Preproduction - brainstorm an idea / gather images / visualize a layout / consider interactivity / create folder
Production - create base image for slicing / size render image swaps / seek links for pop up menues
- slice base image / add interactivity /
Post Production - save then export production to project folder
- F12 to prove interactivity
- upload folder
- create separate HTML doc and insert fireworks html / customize page and upload / create button from homepage (index)
![]()
2
- complete all 5 button types in your index page
- iFrame tutorial - small amount of text and a picture TOPIC = accident in Hampstead Ontario
- World Map interactive tutorial
![]()
2 - welcome to the digital arts course - to start is half the work
L
When you have created your new web space cut and paste the index page web address (URL) you have created and send it with YOUR NAME as seen on a student list to harrismailbox@gmail.com
I will use your address as a link in the class directory
You can work from home if you have DreamWeaver - simply click on the site file (.ste) that you create and your site can be managed from anywhere (the original cloud)
with the web address (URL) included
semester p-4
mmmmm vvvvvvvvvvvvvvvvvvvvvvvvvvvvvvvvvvvmmmmm
USB drive
by signing up with Zymic
What's up Soon?
s
| P -1|
Australian School Phone Messag
DIRECTORY SPRING 2010fall 2009 directory
Class pix fall 2006
pictures of grade 12
class students spring
What's DUE?
Send URL to
harrismailbox@gmail.com
Communication Mark = 10m
1) Begin Website INDEX page
Small Communication and Knowledge marks for creating buttons and links
hypertext links, image link, rollover link, flash Button, animated flash button (over state animated)
K = 5X5 = 25 marks
![]()
2 - I frames -
![]()
3) Create/Send
URL
to
harrismailbox@gmail.com
along with your name
C = 10 marks
![]()
5) World Map Of Flags
- inserted into a DreamWeaver Doc and posted online
- 3 flags
- 3 pop up menues
-2 links in each pop up
![]()
6) - Interactive Web Design
- evaluation
![]()
timeline animation
25 marks